Build Your Perfect Stick
Stick Guide
Everything you need to know to build your perfect custom stick. Use this as a reference while placing your order.
Interactive Tools
Plan your perfect build
Stick Visualizer
Pick colors and see how your custom Marvic stick will look before you order.
OpenStick Finder
Answer a few questions and we'll recommend the perfect stick specs for your game.
OpenCurve Comparison
Compare all 13 blade patterns side by side. Filter by type, face angle, and play style.
OpenBuild Like a Pro
See what curves the pros use and build one just like your favorite player's.
Open01
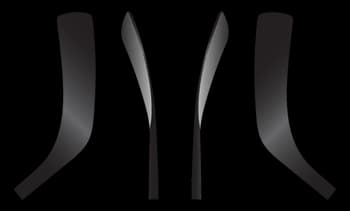
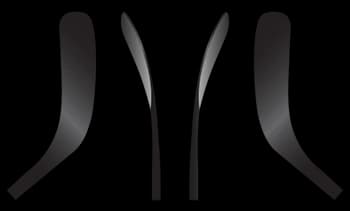
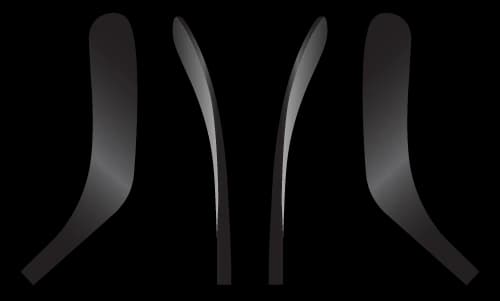
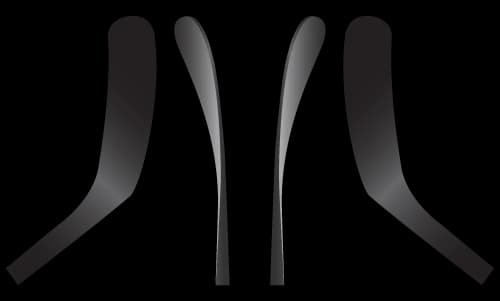
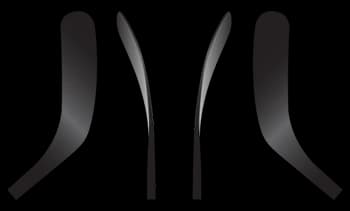
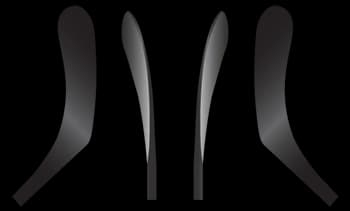
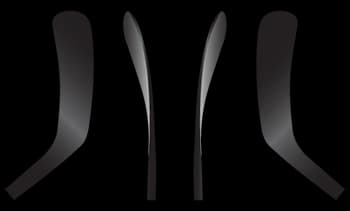
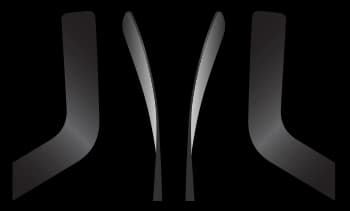
Blade Patterns
Choose the curve that matches your play style. Each pattern has different characteristics for shooting, passing, and puck handling.
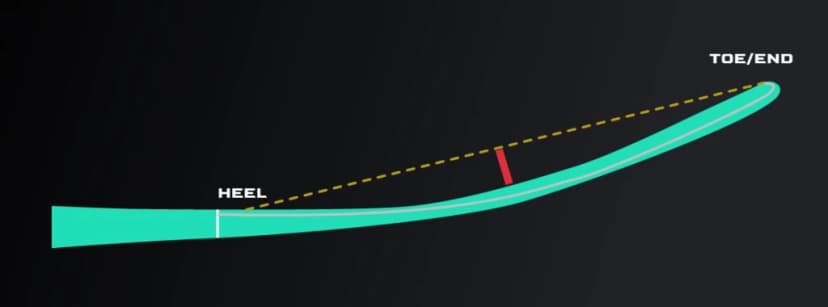
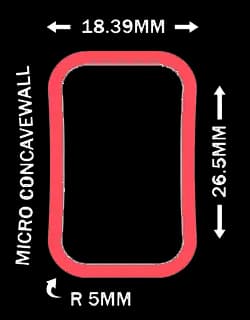
How Curve Depth is Measured
MH02
MH9
MH14

MH28
MH28M
MH77
MH88
MH8 Crazy Ovi
NEW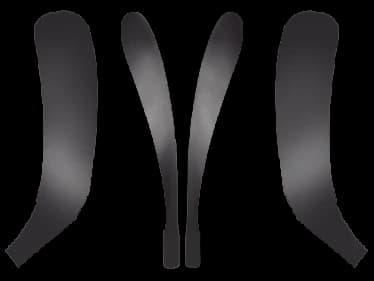
MH90TM
MH91A
MH92
MH92M
MH31 Goalie
02
Stick Colors
Pick your color setup. Single orders choose one of the five modes below; team and bulk orders can run fully custom per-zone color combos.
1. Default: Clear Carbon Black
Standard look across the whole stick. No paint, no upcharge.
2. Brushed Silver
Chemical-process silver finish covering the whole stick. Bare metallic look.
3. Metallic color
A transparent color over a Brushed Silver base. The silver is what makes it bright, vivid, and metallic. Covers the whole stick.
4. Solid Color
A single opaque solid color across the whole stick - White, Black, Wood, or ANY Pantone C code. Note a specific Pantone code in Custom Color Notes at checkout.
5. 2-tone
Two colors: a top, and a bottom that covers the mid and blade. Each section can be any transparent or Pantone color. (White, Black, and Wood are whole-stick only - use Solid Color for those.)
Finish: muted or metallicthe two ways a see-through color comes
Every see-through (transparent) color comes two ways. It’s the same color - what changes is the base it sits on.
The color sprayed onto Clear Carbon (Black). Subtle and muted - the dark carbon shows through.
The same transparent color, this time over a Brushed Silver base. The silver base is what turns the color overlay shiny and metallic.
This muted-vs-metallic choice is only for see-through (transparent) colors. Solid colors (any Pantone, plus White and Black) are opaque: just the flat color, no finish choice. Wood is its own grain finish.
Transparent Colors
Solid Colors
One opaque color over the carbon - flat and vivid, not see-through, with no dull/shiny finish (that’s for transparent colors). White, Black, Wood, and any Pantone C code are all available; note a specific Pantone code in Custom Color Notes at checkout. A Pantone can cover the whole stick (here) or be one section of a 2-tone; White, Black, and Wood are whole-stick only.
Wood Grain
A wood-grain solid finish - opaque like White and Black, just with a grain look instead of a flat color. Covers the whole stick.
Logo Colors
03
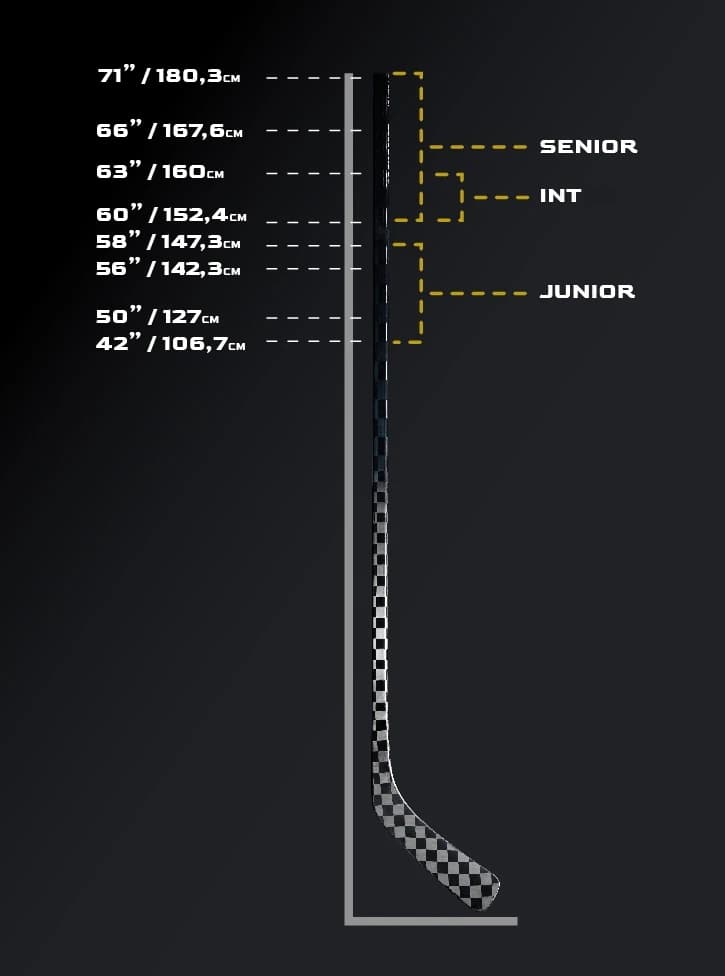
Sizing Guide
Stand the stick upright against a wall with the blade flat on the floor. Measure from the floor to the butt end of the shaft. This is the stick length shown in the chart below.
Length Measurement
Junior
Intermediate
Senior
Goalie Paddle
21"–28" · separate from player length
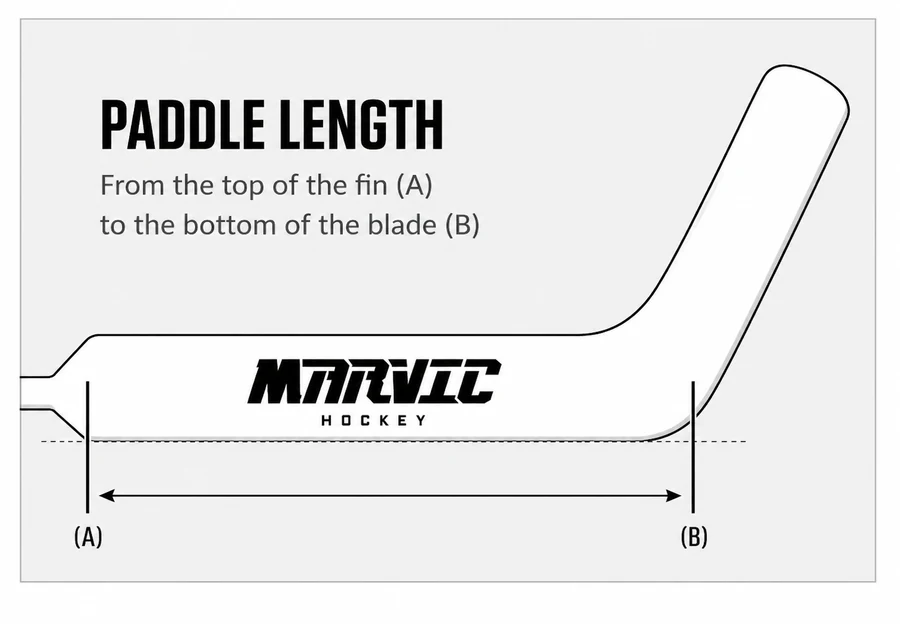
Paddle Length Measurement
Junior
Senior
Measure paddle length from the top of the fin (A) to the bottom of the blade (B). Oversize paddles carry an upcharge, shown in the sizing table above.
04
Color Zones
Three shaft zones plus the Marvic logo. Each can be a different color.
01 · TOP OF THE STICK · GRIP AREA
Upper Shaft
The upper portion you hold. The most visible section, where your name, number, or custom text goes. The most impactful zone for team color matching.
02 · MARVIC WORDMARK · UPPER SHAFT
Logo
The MARVIC wordmark on the upper shaft. Pick whatever pops against your upper-shaft color. All seven finishes are shown in the Logo Colors swatches below.
03 · CENTER SECTION · GRIP TO BLADE
Mid Shaft
The transition zone. Using a different color here creates a striking two- or three-tone look, often matched to your team's accent color.
04 · HOSEL DOWN TO THE TOE
Blade
The part that contacts ice and puck. Many leave this dark carbon for a clean look and durability, but it can be any color in the palette.
Tip: Each zone can be a different color. Set the upper shaft first and matching mid/blade auto-update; change them individually for a multi-color look.
05
Shaft Shapes
How the shaft feels in your hands. Each shape offers different grip and control characteristics.
Senior: pick one in the builder
Standard
Traditional rounded rectangular cross-section. The classic feel most players are used to.
Penta
Five-sided cross-section with flat walls for improved grip and puck feel.
Arc
Rounded ergonomic profile. Natural hand position, reduces fatigue on longer shifts.
Intermediate & Junior: auto-assigned to fit the size
V3
Intermediate onlyA slimmer cross-section tuned for intermediate hand size. Ships on every V3 intermediate stick. Not a pickable option; the right shape comes with the size.
Junior
Junior onlyA thinner shaft sized for smaller hands. Ships on every Junior stick automatically. Not a pickable option; the shape is built into the Junior mold.
ARC Silver-Foil Decal
Free add-onArc shaft onlyWhen you pick the Arc shaft shape, you can opt in to a translucent silver-foil ARC decal that sits behind the regular shaft logo color. Free, opt-in per stick. Available on Arc-shape player sticks only. Goalies, Standard, Penta, V3, and Junior molds do not get the foil.
Spec note: picking the decal also switches the shaft and blade carbon weave from the standard 18K to 24K. If you skip the decal, your Arc stick stays on the standard 18K weave.
06
Grip Options
Every grip is two choices layered together: a Surface that determines how sticky the shaft feels, and an optional Pattern (texture structure) laid on top, purely personal preference.
Surface drives stickiness, ranked from tackiest to slickest:
- SoftTouch: strongest grip, most tack
- Matte Grip: medium sticky
- No Grip: no tack, smooth
Straight from the factory: “The patterns are mainly personal choice. In the end you can't really tell which one has more grip or which one is less sticky.” So pick the look and feel you like. The tack comes from the surface.
Surfaces
controls stickiness · bare surface, no pattern overlay
3 optionsSoftTouch Grip
Player + GoalieSoftTouch surface (strongest tack) with no overlaid structure - a clean, low-profile rubberized coating. The tackiest option we offer.
Matte Grip
Player onlyMatte Grip surface (medium sticky) with no overlaid structure. A restrained, middle-of-the-road tack - noticeably grippier than bare carbon but less tacky than SoftTouch.
No Grip
Player + GoalieMatte surface (no tack, smooth) with no structure overlay. Slick finish for players who tape their own grip, and goalies who prefer a free-moving paddle that rotates in the glove.
Full-Face Patterns
patterns that cover the whole shaft · layer on any surface
1 pattern
Basketball
Player + Goaliealso known as "3D Square Grip"
Also known as "3D Square Grip" - SoftTouch surface (strongest tack) with a Basketball structure: a blocky raised square pattern that bites into the glove palm. Maximum tactile feedback; used on goalie paddles and players who want the grippiest feel.
07
Kick Point
Where the shaft flexes during a shot. This determines how energy transfers from your hands to the puck.
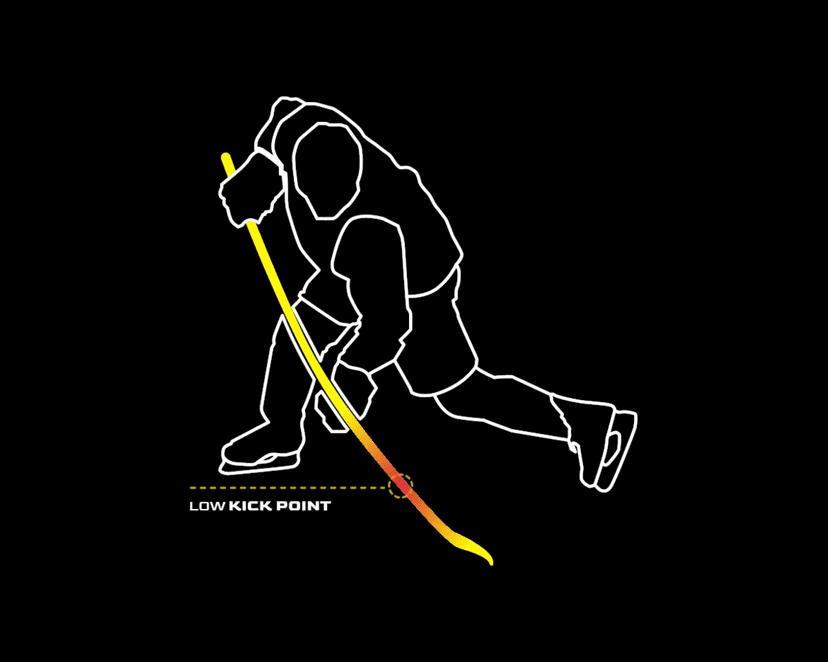
Low Kick
Flex point near the blade for lightning-fast wrist and snap shots. The shaft loads and releases quickly for a rapid release. Best for forwards who shoot in tight.
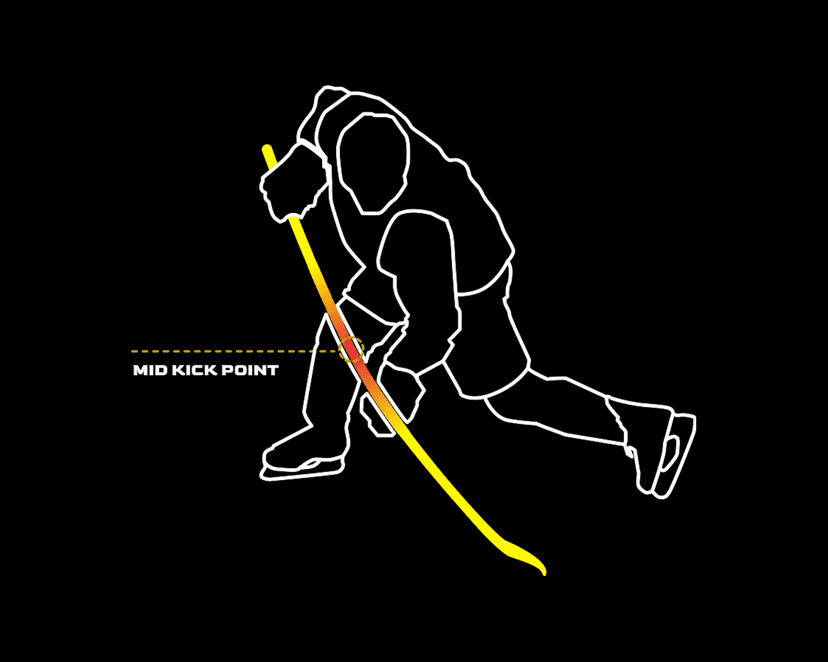
Mid Kick
Flex point in the center of the shaft for maximum power. Stores more energy for harder slap shots and one-timers. Best for defensemen and power shooters.
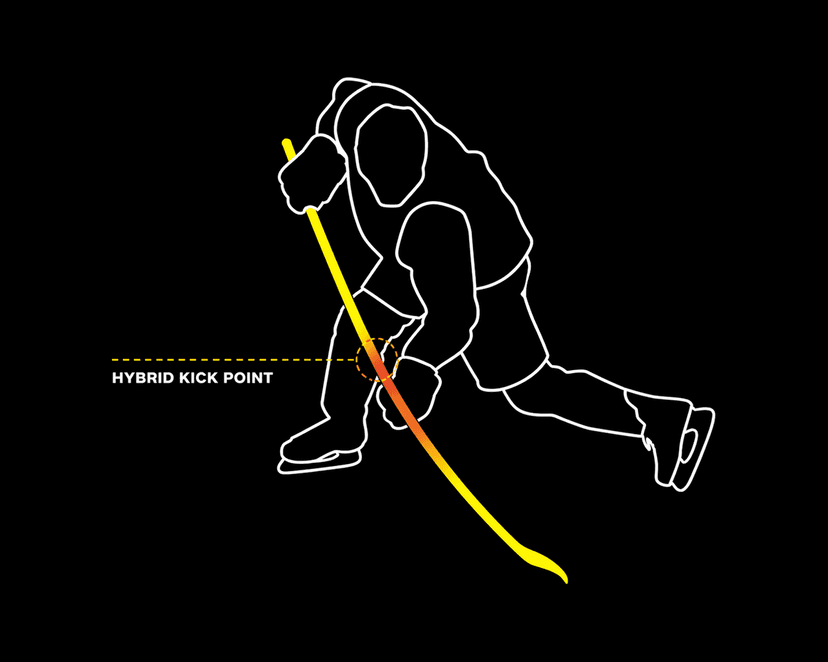
Hybrid Kick
The best of both worlds, ideal for two-way players. The flex point shifts based on where your lower hand sits on the shaft: it bends more toward the center (Mid Kick) for slap and snap shots, but moves closer to the blade (Low Kick) for wrist shots. A dynamic flex profile. Great for players who want quick releases AND powerful shots without compromising either.
08
Blade Specs
Fine-tune your blade's stiffness and surface texture for your play style.
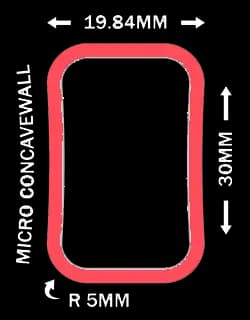
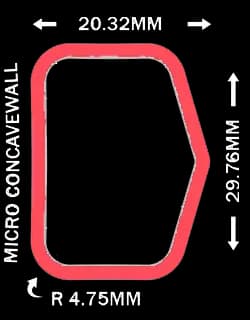
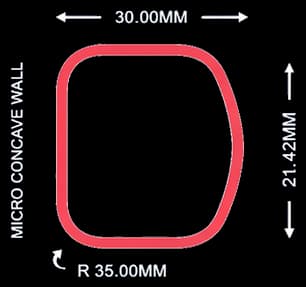
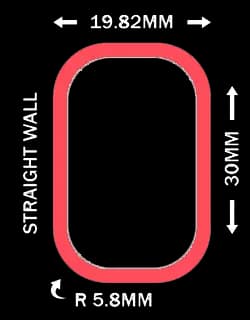
Blade Hardness
Blade Surface
09
Flex Rating
Flex measures how much force (in pounds) is needed to bend the shaft one inch, measured at a standard 40" length. A lower number means a whippier stick.
General Rule
Divide your body weight (in lbs) by two for a starting point. Adjust down for quicker release, up for more power. Forwards typically go softer, defensemen stiffer.
Length Affects Feel
Cutting a stick shorter makes it feel stiffer. Adding length makes it feel softer. A 75 flex at 66" will feel different than a 75 flex cut to 62". Factor this into your choice.